Saved Views and Favorites
Overview
You can save views and favorites in Lumigo, allowing you to streamfline your workflows by making frequently used queries and important transactions quickly accessible without having to search or type them up again. Rather than rebuilding the same filters and searches each time, you can save them as views and reopen them at any time. Favorites further centralize and highlight your most critical saved views and transactions for easy access.
Both saved Views and Favorites are shared at the project level, ensuring that all team members can benefit from consistent data views and collaborative workflows.
Features
Saved Views
- Per-Page Saving: You can save views for each search page, including Traces, Logs, Issues, and Metrics.
- Filter & Timeframe Preservation: You can use saved views to apply stored filters, selected timeframes, and specifically on the Logs page, custom table column order.
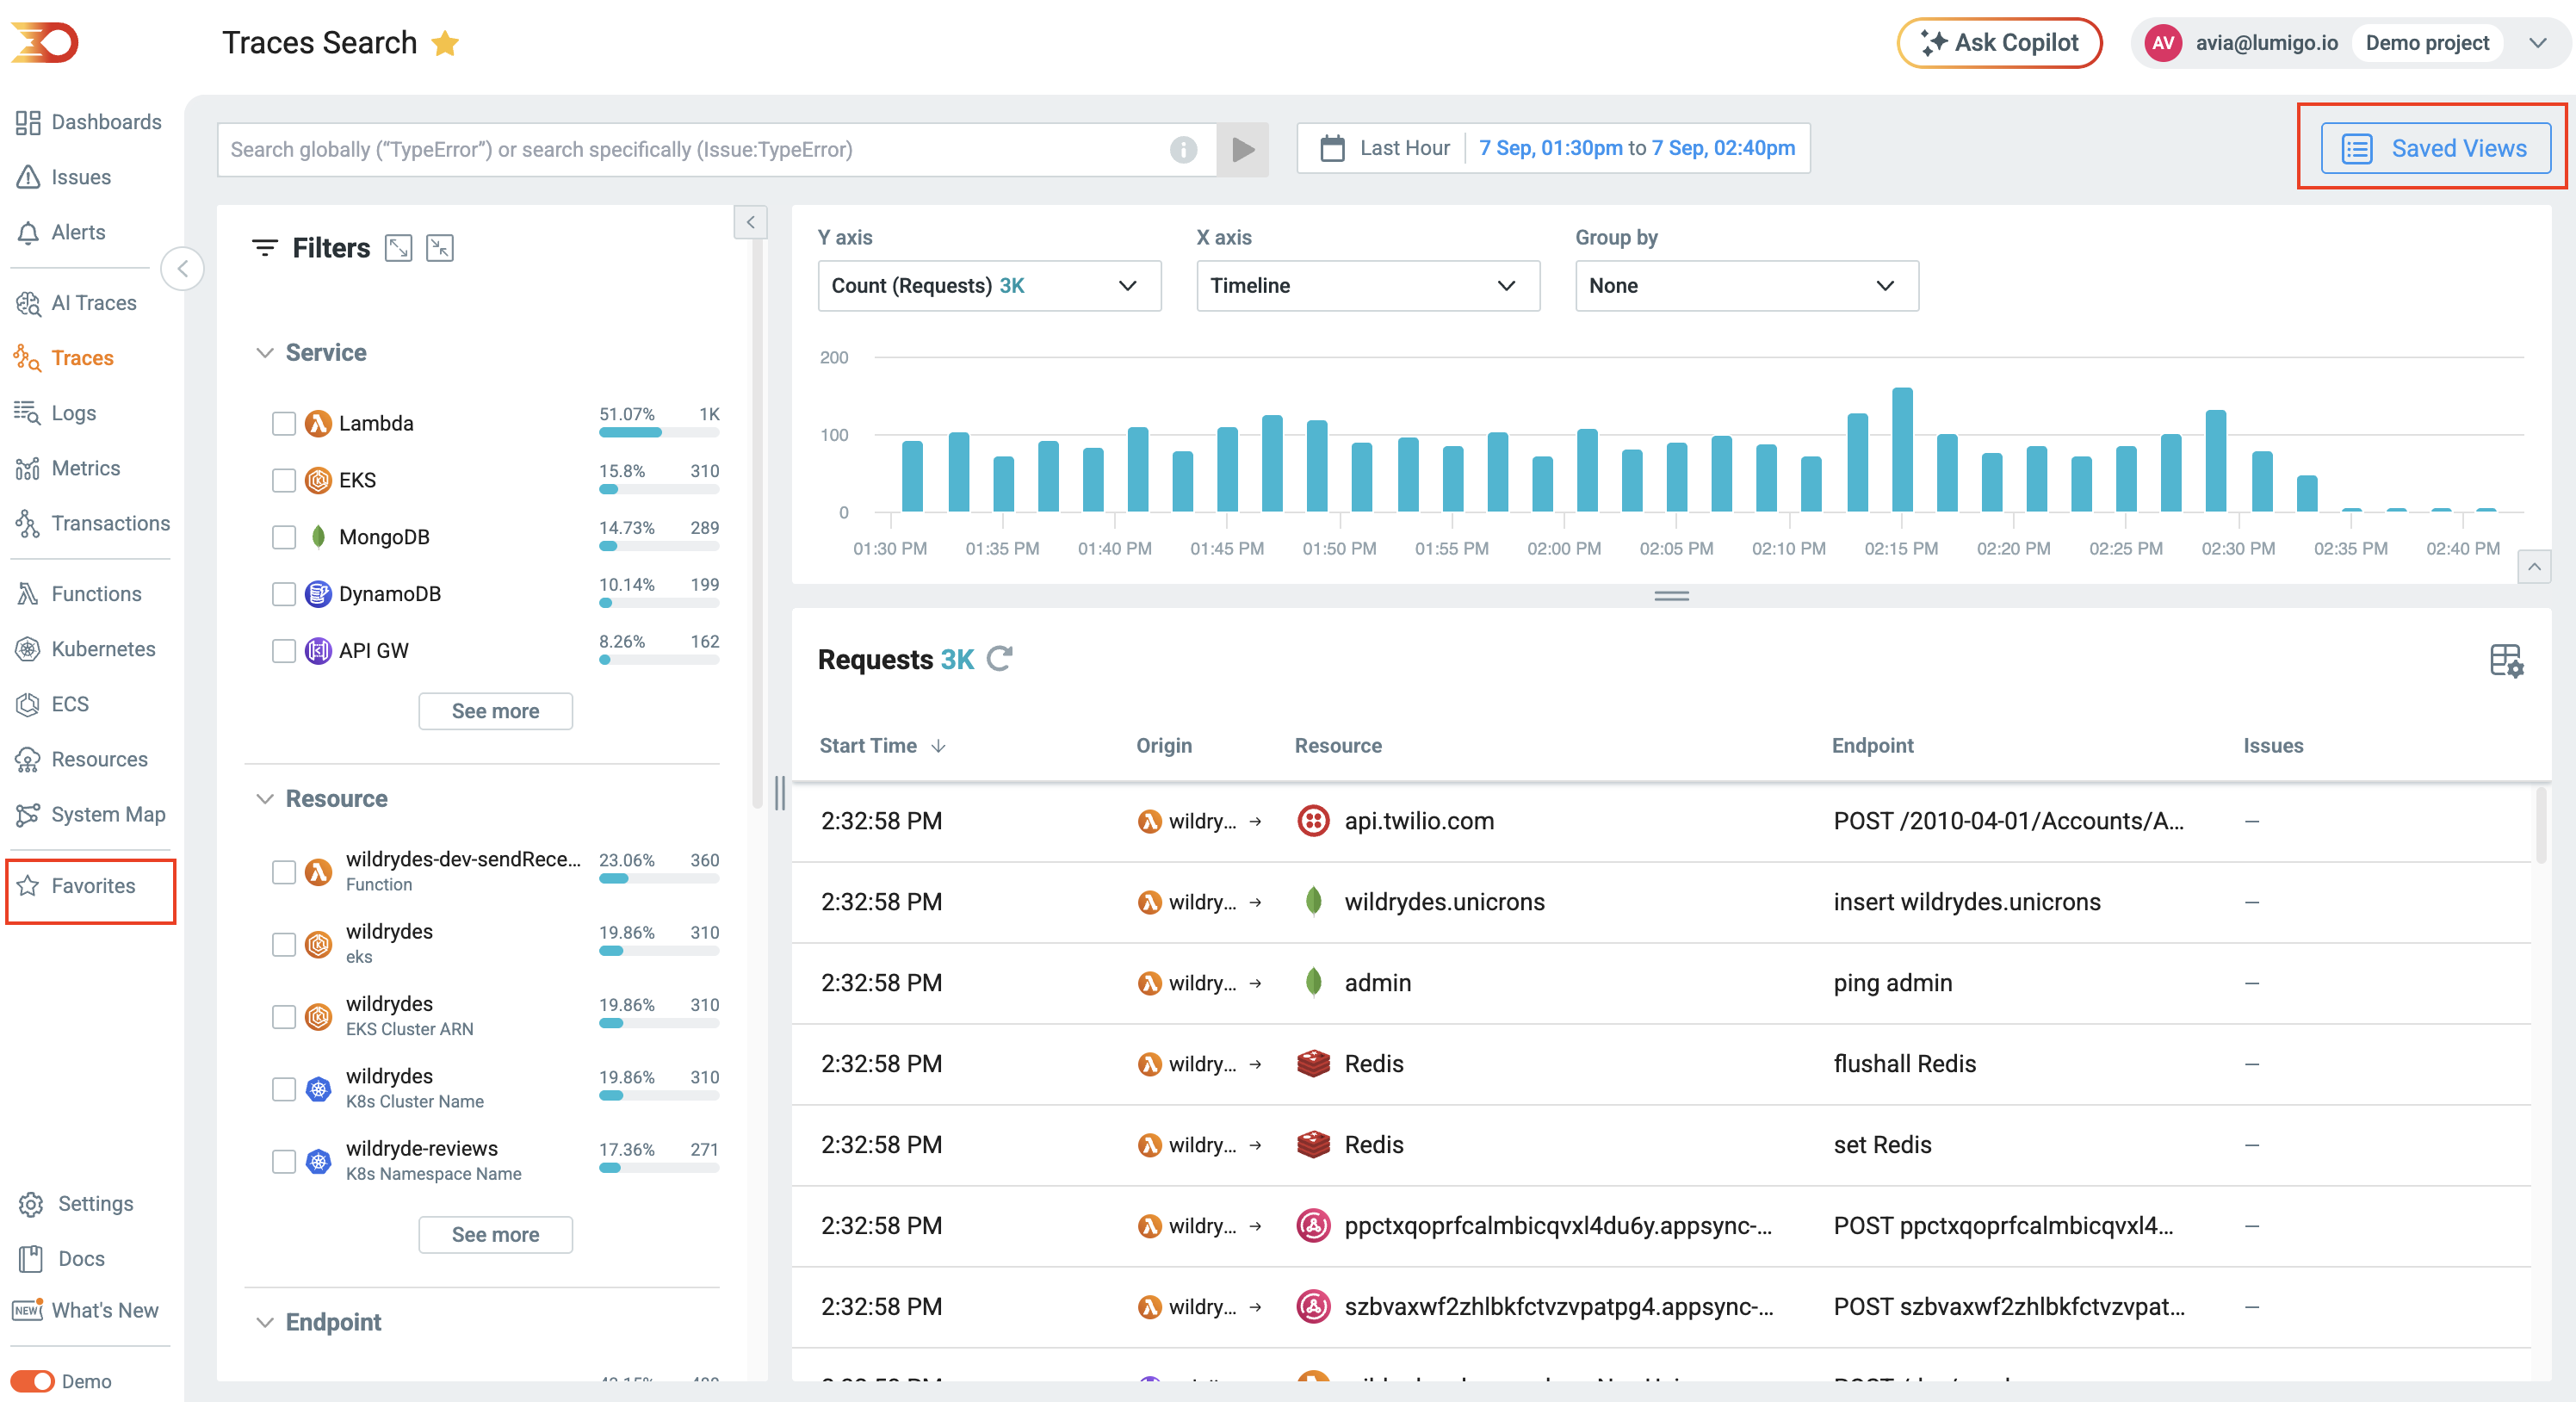
- Quick Access: You can gain access to your saved views from the Saved Views menu on the same page or by clicking the star icon.
- Editing & Management: You can rename, update, or delete saved views at any time and generate shareable links for them.
Favorites
- Centralized Access: Favorites are accessible via the bottom-left navigation button, which opens a modal displaying all saved views across all pages.
- Transaction Preservation: You can mark individual transactions as favorites to retain them beyond Lumigo’s standard data retention period. This is the only way to permanently save a transaction.
- Filtering: The Favorites modal includes filters to help you quickly locate specific views or transactions.
- Direct Links: Favorited transactions keep their direct URLs permanently accessible.
How to save views and use favorites
Saving a View
- Navigate to the relevant search page out of Traces, Logs, Issues, or Metrics.
- Apply filters, select a timeframe, and if Logs, arrange columns as needed.
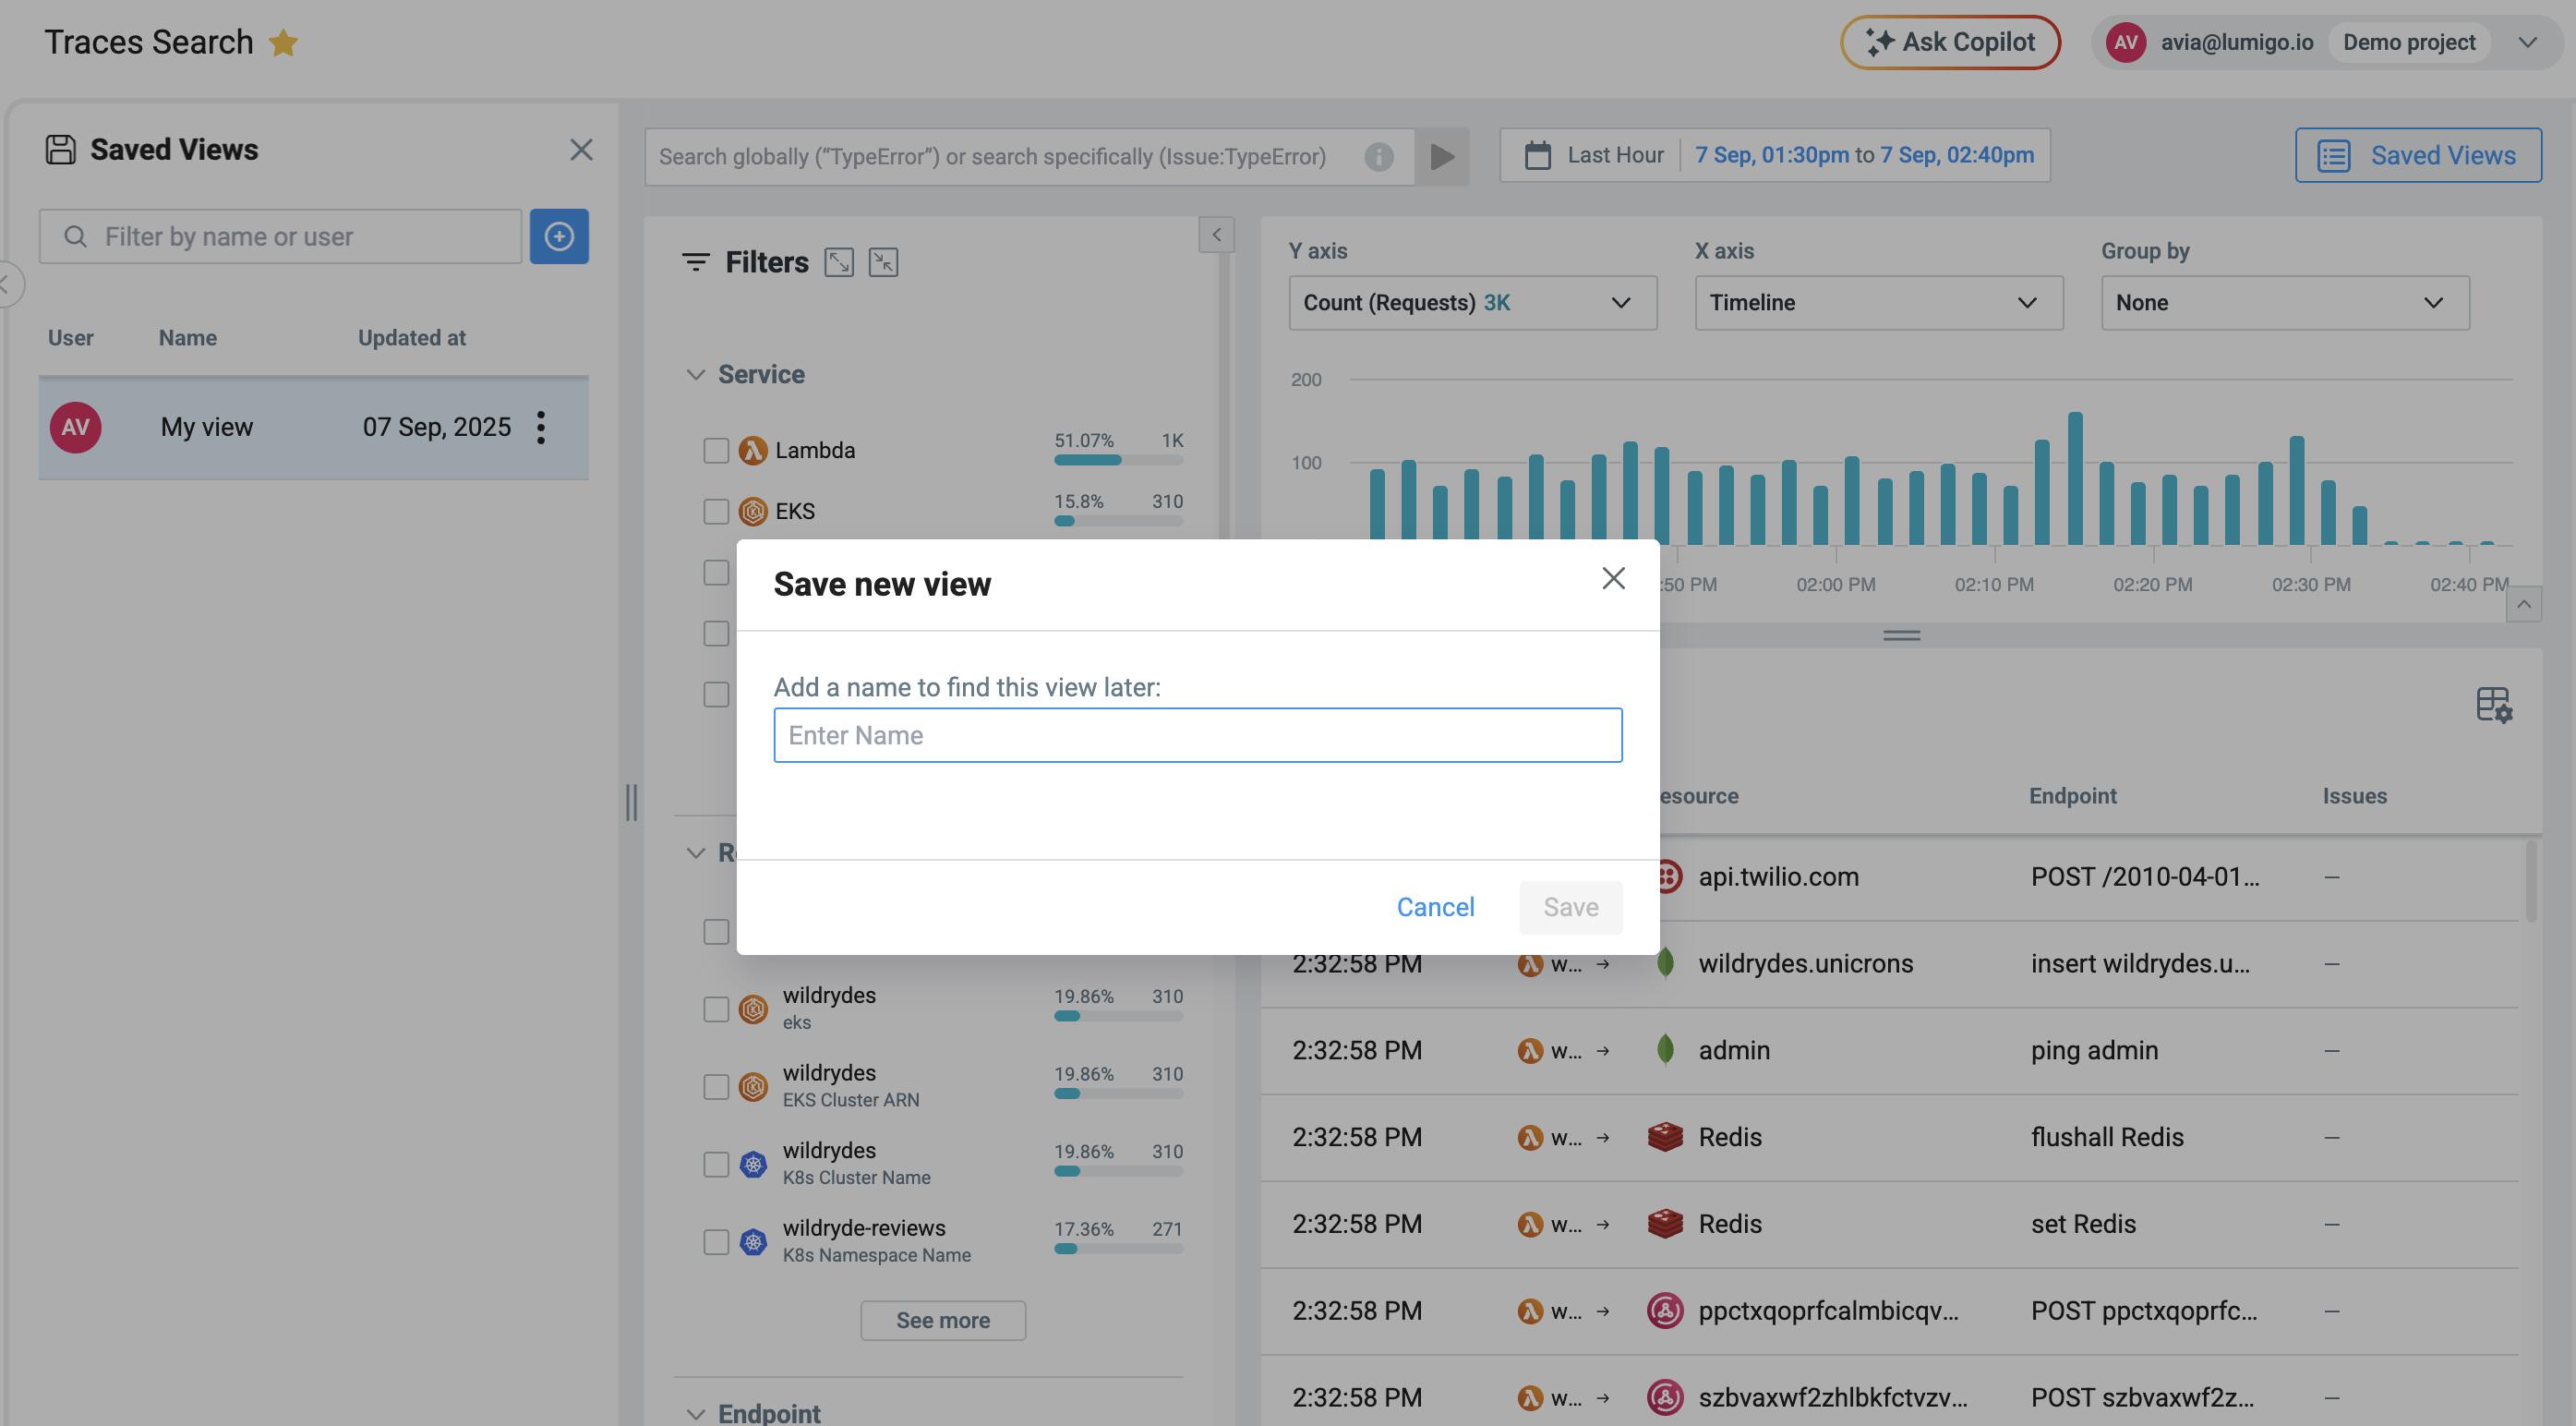
- Click the Saved Views button at the top of the page.
- Select Save Current View.
- Give the view a descriptive name and confirm.
- (Optional) Click the star icon to immediately add the view to your Favorites.
Accessing Saved Views
- Go to the same search page where the view was saved.
- Open the Saved Views menu to find your saved view.

- Click the view name to load it with all filters, timeframes, and configurations applied.
Adding a View or Transaction to Favorites
- To favorite a view: Click the star icon next to the Saved View name. The star turns yellow when active.
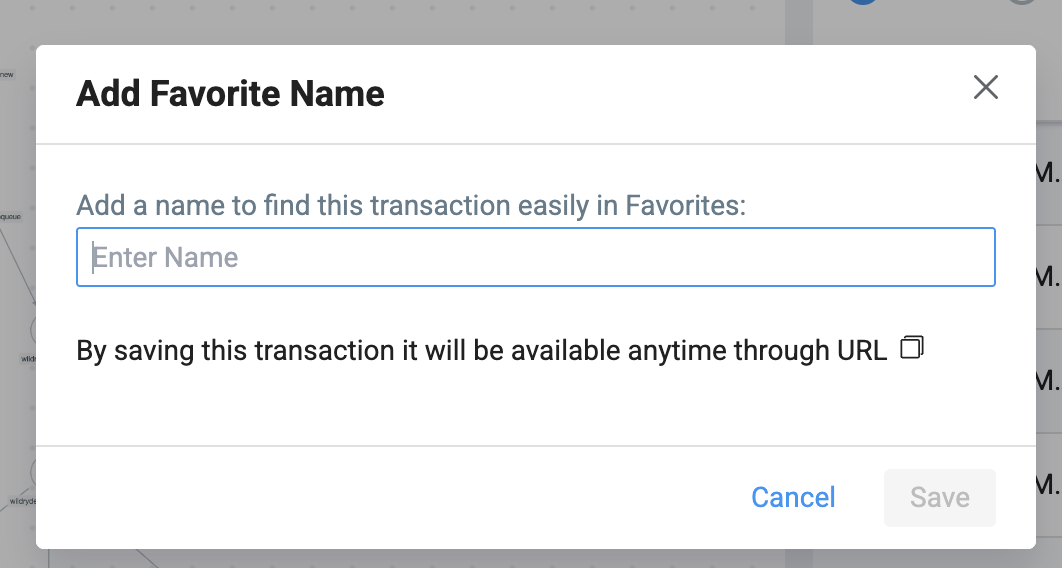
- To favorite a transaction: Open the transaction details and click the star icon next to the title.
Viewing Favorites
- Click the Favorites button in the bottom-left navigation bar.
- Use the modal to browse all saved views and favorited transactions.

- Apply filters to quickly locate specific items.
- Open a favorited transaction or view with a single click.
Use Cases
- Frequent Searches: Save complex queries, such as “Errors in production environment,” and access them in one click.
- Collaboration: Ensure team members use the same filters and views when investigating incidents or monitoring performance.
- Data Retention: Mark key transactions as favorites to preserve them for audits, RCA (root cause analysis), or long-term reference.
- Monitoring: Create saved views for critical services and favorite them to keep them just one click away for daily checks.
- Efficiency: Reduce time spent repeatedly building the same queries and maintain consistency across investigations.