Copilot MCP for IDE Integration
Overview
You can connect Lumigo Copilot to your IDE via the Lumigo MCP (Model Context Protocol) server, allowing you to investigate and resolve production issues without leaving your code environment.
This allows you to ask your AI code agent questions in natural language, such as:
- "Ask Lumigo what's the root cause of the 500 error on the submit-order service."
- "I got an alert from Lumigo about an authentication error, help me fix it."
For integrating Lumigo Copilot into your IDE via the MCP server, follow the steps below.
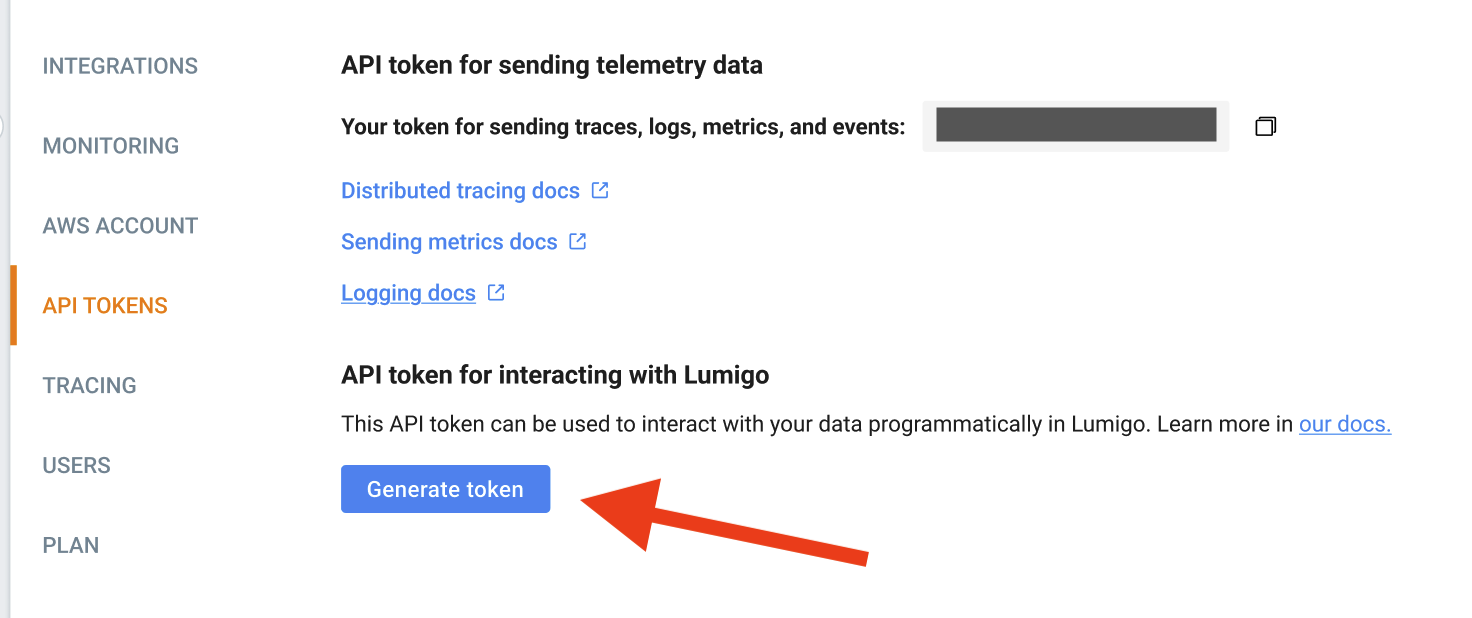
1. Create an API token in Lumigo
To authenticate with the Lumigo MCP server, you first need to create an API token.
- In Lumigo, go to Settings → API Tokens.
- Look for the section API token for interacting with Lumigo.
- Click Generate token, then copy the token.
2. Add the MCP server
Depending on which IDE or code agent you use, follow one of the below sections:
GitHub Copilot on Visual Studio Code
GitHub Copilot on Visual Studio Code
- Open the command palette (Cmd+Shift+P or Ctrl+Shift+P).
- Type and select "MCP: Add Server...".
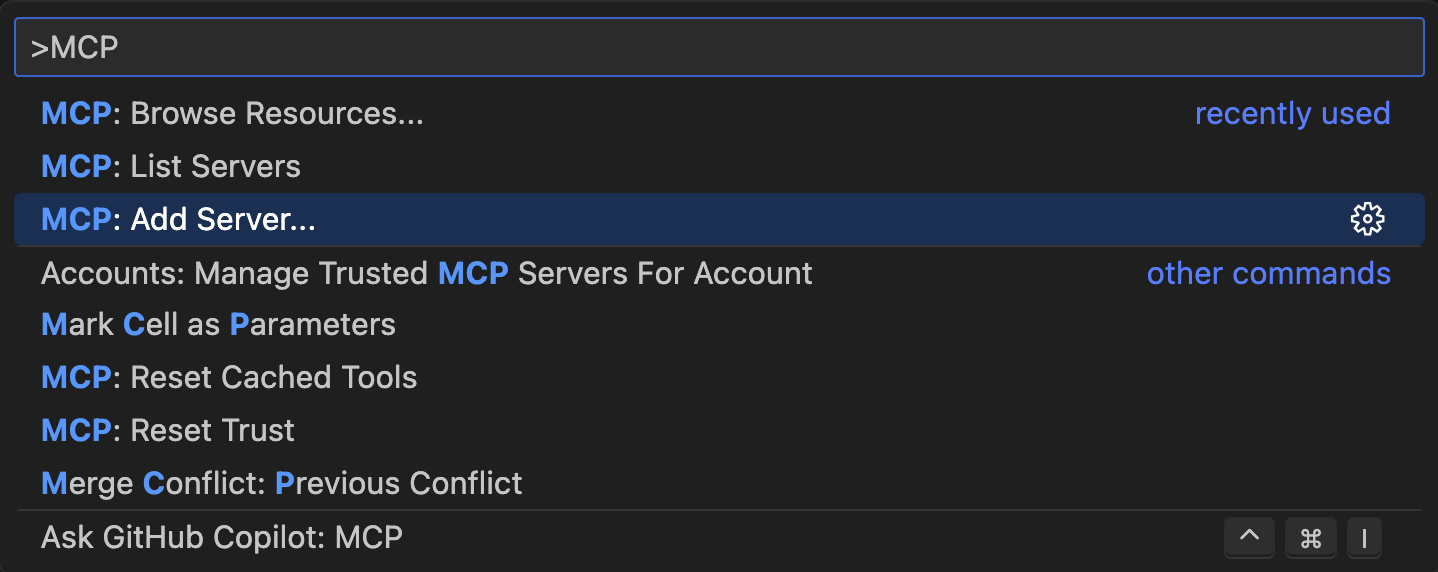
- Choose HTTP as the server type.
- Enter the Lumigo MCP server URL:
https://gvhlycnftrclty2g2adbcgyfh40zwzgs.lambda-url.us-west-2.on.aws/issue/mcp
-
Set a name for the server such as lumigo-copilot.
-
Choose where to save it. Lumigo recommends User Settings for global availability.
-
VSCode will open your settings.json file. Add your Lumigo API token under the x-api-key header:
"lumigo-copilot": { "url": "https://gvhlycnftrclty2g2adbcgyfh40zwzgs.lambda-url.us-west-2.on.aws/issue/mcp", "headers": { "x-api-key": "xxxxxxxxxxxxxxxxx" } } -
Save the file. GitHub Copilot can now route questions to Lumigo Copilot and provide observability-powered answers.
Cursor IDE
-
Open the command palette (Cmd+Shift+P or Ctrl+Shift+P).
-
Type and select "View: Open MCP Settings"

-
Under MCP Tools, click on Add Custom MCP, then add the following JSON to the file that opens. Replace the
xxxxxxxxxwith your Lumigo API token under the x-api-key header."lumigo-copilot": { "url": "https://gvhlycnftrclty2g2adbcgyfh40zwzgs.lambda-url.us-west-2.on.aws/issue/mcp", "headers": { "x-api-key": "xxxxxxxxxxxxxxxxxxxxxxxxxxxxxxxx" } } -
Save the configuration. Cursor can now route questions to Lumigo Copilot and provide observability-powered answers.
GitHub Copilot on other IDEs
- In JetBrains IDEs: Click the GitHub Copilot icon -> Edit settings -> find the MCP Servers section.
- In Eclipse: Click the GitHub Copilot icon -> Edit Preferences -> find the MCP Servers section
- In Xcode: Open the GitHub Copilot for Xcode App -> Click the tool picker in Agent Mode -> Select Edit Config
Add the Lumigo MCP server. Replace the xxxxxxxxx with your Lumigo API token under the x-api-key header:
"lumigo-copilot": {
  "url": "https://gvhlycnftrclty2g2adbcgyfh40zwzgs.lambda-url.us-west-2.on.aws/issue/mcp",
    "headers": {
      "x-api-key": "xxxxxxxxxxxxxxxxxxxxxxxxxxxxxxxx"
    }
}Updated 10 months ago